Manage Pages
Pages are the documentation layer of SetGet. Every project has a built-in page system where your team can create meeting notes, technical specs, onboarding guides, decision records, and any other written content that lives alongside your work items. Pages support rich formatting, inline comments, version history, nested hierarchies, and granular access control.
How to create a page
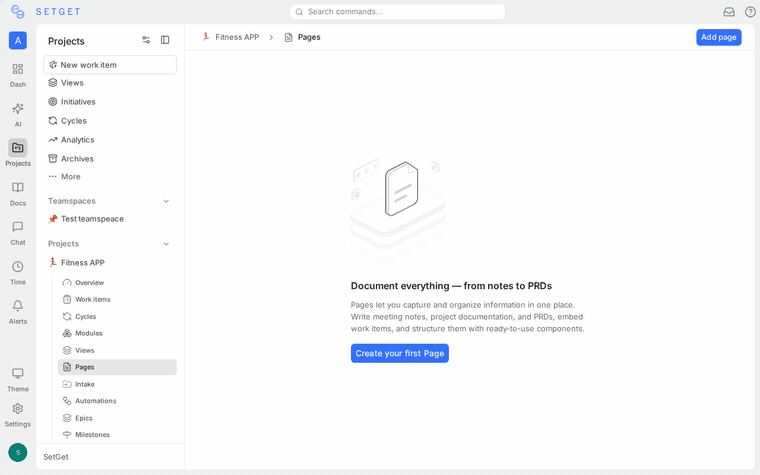
Quick create
The fastest way to start a new page:
- Open a project and navigate to the Pages section in the sidebar.
- Click the + button at the top of the page list.
- Type a title and begin writing immediately.
The page is created in draft mode with default access (visible to all project members). The editor auto-saves your work as you type.
From the project header
- Click Create in the project header or press
Don your keyboard. - Select Page from the creation menu.
- Enter a title and optional description.
- Choose an access level (public or private).
- Click Create Page to open the editor.
From a template
If your project has page templates defined, you can start from a template:
- Click + in the page list.
- Select From Template.
- Choose a template from the list.
- The editor opens pre-filled with the template content. Modify as needed.
See Page Templates for details on creating and managing templates.
Page list
The page list shows all pages you have access to within the current project. Each entry displays:
| Column | Description |
|---|---|
| Title | The page name, shown as a clickable link |
| Created by | The member who created the page |
| Updated at | Timestamp of the last edit |
| Access | Icon indicating public or private visibility |
| Favorited | Star icon if the page is in your favorites |
| Labels | Any labels attached to the page |
Sorting options
You can sort the page list by:
- Last updated (default) — most recently edited pages first
- Last created — newest pages first
- Title A-Z — alphabetical order
- Title Z-A — reverse alphabetical order
Click the sort dropdown at the top of the list to change the sort order.
Filtering pages
Use the filter bar to narrow down the page list:
| Filter | Description |
|---|---|
| Created by | Show only pages created by a specific member |
| Access | Filter by public or private pages |
| Labels | Filter by one or more labels |
| Favorited | Show only pages you have favorited |
Multiple filters can be combined. Active filters are shown as chips below the filter bar.
Page properties
Every page has a set of properties that control its behavior and visibility:
| Property | Description | Editable by |
|---|---|---|
| Title | The page heading displayed in the list and breadcrumb | Creator, editors |
| Description | Optional summary shown below the title in the list | Creator, editors |
| Access level | Public (all project members) or Private (creator only) | Creator |
| Labels | Categorization tags | Creator, editors |
| Locked | Prevents editing by anyone except the person who locked it | Creator, admins |
| Archived | Moves the page out of the active list | Creator, admins |
| Created at | Timestamp, set automatically | System |
| Updated at | Timestamp, updated on every save | System |
To edit page properties, click the ... menu on the page row or open the page and use the properties panel.
Search pages
Use the search bar at the top of the page list to find pages by title or content.
- Click the search icon or press
/to focus the search field. - Type your query. Results update as you type.
- Results match against page titles and body content.
- Click a result to open the page.
For workspace-wide search that includes pages from all projects, use the global search shortcut (Ctrl+K or Cmd+K).
Favorite pages
Mark frequently accessed pages as favorites so they appear at the top of your sidebar.
- Hover over a page in the list.
- Click the star icon on the right side of the row.
- The page now appears under Favorites in the sidebar.
To remove a favorite, click the star icon again. Favorites are personal and do not affect other members.
Share pages
Pages can be shared in several ways depending on the use case:
| Method | Scope | How to |
|---|---|---|
| Public access | All project members can view and edit | Set access level to Public |
| Private access | Only the creator can view and edit | Set access level to Private |
| Lock | Anyone can view, but editing is restricted | Toggle the lock on the page |
| Publish | Anyone with the link can view (including non-members) | Enable publishing in the page menu |
| Share link | Copy a direct link to send to team members | Click Copy link in the page menu |
See Page Access Control for detailed permission rules and Publishing for public page sharing.
Archive a page
If a page is no longer relevant but you want to keep it for reference:
- Open the page or click its ... menu in the list.
- Select Archive.
- The page moves to the Archived section.
Archived pages are excluded from search results by default. You can restore an archived page at any time by opening the archived section and selecting Restore.
Delete a page
- Open the page or click its ... menu in the list.
- Select Delete.
- Confirm the deletion in the dialog.
WARNING
Deleting a page is permanent. The page content, its comments, version history, and any nested child pages are all removed. Consider archiving instead if you might need the content later.
Duplicate a page
To create a copy of an existing page:
- Open the page or click its ... menu.
- Select Duplicate.
- A new page is created with the same content and a title prefixed with "Copy of".
- The duplicated page opens in the editor for immediate editing.
Duplicating a page does not copy comments, version history, or access settings. The new page inherits default access.
Page labels
Labels help categorize pages so your team can find content by topic or purpose.
Adding labels
- Open the page or click the ... menu on the page row.
- Select Labels.
- Choose from existing labels or create a new one.
- Labels appear as colored chips on the page row.
Managing labels
| Action | How to |
|---|---|
| Create a label | Click Create label in the label picker, enter a name and color |
| Rename a label | Go to project settings > Labels, click the label, and edit the name |
| Delete a label | Go to project settings > Labels, click the ... menu, select Delete |
| Filter by label | Use the filter bar on the page list to show pages with specific labels |
Labels are shared across all pages and work items in the project. This means the same label set is available in both contexts, enabling consistent categorization.
Bulk actions
When managing many pages, you can perform actions in bulk:
- In the page list, hold
Ctrl/Cmdand click to select multiple pages, or holdShiftto select a range. - A bulk action bar appears at the bottom of the screen.
- Available bulk actions:
| Action | Description |
|---|---|
| Archive | Move all selected pages to the archive |
| Delete | Permanently delete all selected pages |
| Change access | Set all selected pages to public or private |
| Add label | Apply a label to all selected pages |
| Remove label | Remove a label from all selected pages |
WARNING
Bulk delete is permanent and cannot be undone. Double-check your selection before confirming.
Page emoji icons
Each page can have a custom emoji icon that appears in the sidebar and page list:
- Open the page.
- Click the emoji placeholder (or existing emoji) to the left of the title.
- Select an emoji from the picker.
- The icon appears in the sidebar next to the page name.
Emoji icons make it easier to visually identify pages when scanning the sidebar.
Keyboard shortcuts
| Shortcut | Action |
|---|---|
D | Create new page |
/ | Focus search |
Ctrl+K / Cmd+K | Global search (includes pages) |
Ctrl+S / Cmd+S | Force save current page |
Esc | Close page and return to list |
Best practices
- Use descriptive titles — page titles are the primary way people find content. Write titles that answer "what is this about?" at a glance.
- Label consistently — establish a labeling convention (e.g.,
meeting-notes,technical-spec,onboarding) and apply labels to every page. - Favor public access — keep pages public unless they contain sensitive information. Shared knowledge reduces duplication.
- Archive stale content — regularly review your page list and archive pages that are outdated or no longer in use.
- Nest related pages — use the nested pages feature to group related documents under a parent page. See Nested Pages.
- Use the wiki — for structured, long-lived documentation, enable wiki mode on your project. See Wiki.
Related pages
- Page Editor — Rich text editing guide
- Editor Blocks — Block type reference
- Nested Pages — Hierarchical page organization
- Wiki — Structured knowledge base mode
- Inline Comments — Comment on specific content
- Version History — Track and restore versions
- Page Access Control — Permissions and sharing
- Publishing — Share pages publicly
- Page Templates — Reusable page templates