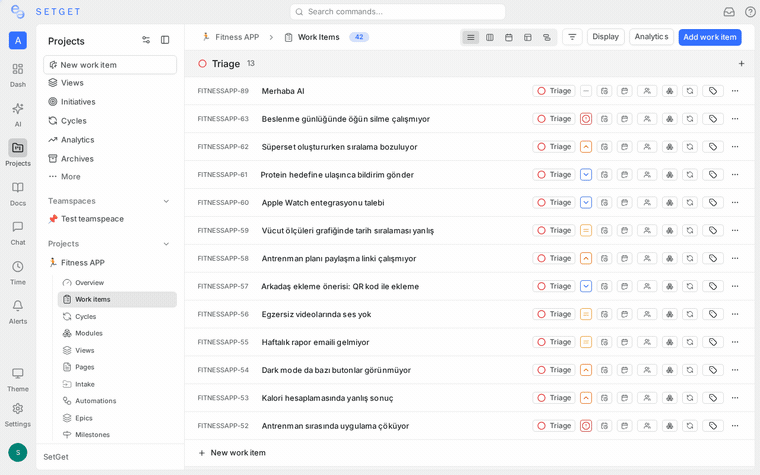
Work Item Labels
Labels are colored tags that you attach to work items to categorize them by domain, area, technology, or any dimension your team cares about. Unlike states (which track workflow position) and types (which classify the nature of work), labels are freeform -- you define them to match how your team thinks about work.
Why use labels
Labels answer questions that states, types, and priorities cannot:
- Which area of the product does this affect? (frontend, backend, API, mobile)
- What kind of effort is this? (design, documentation, infrastructure, security)
- What is the context? (customer-reported, regression, tech-debt, quick-win)
Labels are especially powerful when combined with filters and views. You can create a view showing all "security" items across every project, or filter a cycle to see only "frontend" work.
Apply labels to a work item
From any layout
- Click the label area on a work item row (list, spreadsheet) or card (kanban).
- A dropdown appears showing all available labels for the project.
- Click a label to apply it. A checkmark indicates it is applied.
- Click the label again to remove it.
- Click outside the dropdown to close it.
From the detail view
- Open the work item in detail view or peek panel.
- In the properties panel on the right, click the Labels field.
- Search for labels by name, or scroll through the list.
- Select one or more labels.
During creation
- In the creation modal, click the Labels field.
- Select labels before saving the work item.
A work item can carry any number of labels. There is no limit.
Create labels
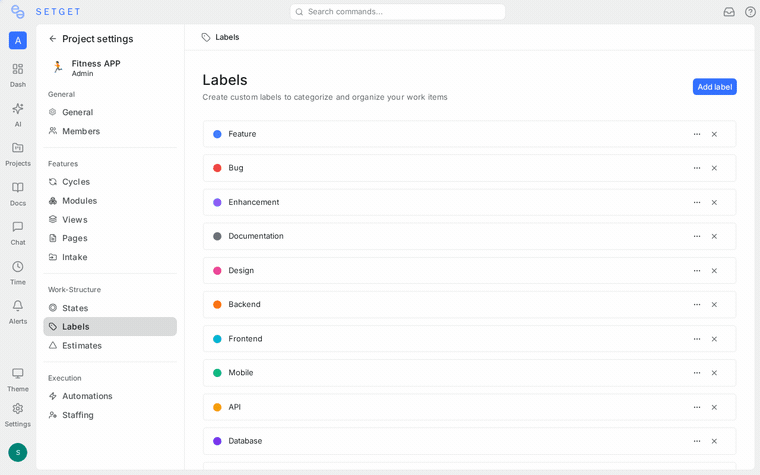
Labels are defined at the project level. Each project has its own set of labels.
Create a label from project settings
- Navigate to the project's Settings page.
- Open the Labels section.
- Click Add Label.
- Enter a label name (e.g., "frontend", "bug-fix", "customer-reported").
- Select a color from the palette or enter a hex code.
- Optionally, select a parent label to create a hierarchy.
- Click Save.
Create a label inline
When applying labels to a work item, you can create a new label on the fly:
- Open the label dropdown on any work item.
- Type a name that does not match any existing label.
- Click Create "[name]" at the bottom of the dropdown.
- The label is created with a random color and immediately applied.
You can edit the color and parent later in project settings.
Label colors
Each label has a color that appears as the background of the label chip. Colors help with quick visual scanning -- you can spot all "urgent-fix" items by their red labels without reading the text.
SetGet provides a preset palette of 18 colors:
| Color | Hex | Suggested use |
|---|---|---|
| Red | #ef4444 | Critical, urgent, blocker |
| Orange | #f97316 | Warning, needs-attention |
| Amber | #f59e0b | Caution, review-needed |
| Yellow | #eab308 | Highlight, external |
| Lime | #84cc16 | Go, approved |
| Green | #22c55e | Done, resolved |
| Emerald | #10b981 | Health, status-ok |
| Teal | #14b8a6 | Design, UX |
| Cyan | #06b6d4 | Info, documentation |
| Sky | #0ea5e9 | Frontend, UI |
| Blue | #3b82f6 | Backend, API |
| Indigo | #6366f1 | Infrastructure, DevOps |
| Violet | #8b5cf6 | Research, experiment |
| Purple | #a855f7 | Enhancement, feature |
| Fuchsia | #d946ef | Creative, branding |
| Pink | #ec4899 | Customer, support |
| Rose | #f43f5e | Security, compliance |
| Gray | #6b7280 | Misc, uncategorized |
You can also enter any custom hex code.
To change a label's color:
- Go to project Settings > Labels.
- Click the color swatch next to the label.
- Pick a new color or enter a hex code.
- Click Save.
Parent-child label hierarchy
Labels can be organized into a two-level hierarchy. A parent label groups related child labels, making it easier to manage large label sets.
Example hierarchy
| Parent label | Child labels |
|---|---|
| Platform | Frontend, Backend, Mobile, API |
| Priority Context | Customer-reported, Internal, Regression |
| Area | Auth, Billing, Dashboard, Editor, Notifications |
Create a child label
- Go to project Settings > Labels.
- Click Add Label.
- Enter the label name.
- In the Parent dropdown, select the parent label.
- Click Save.
Alternatively, drag an existing label under a parent label in the settings list to reparent it.
How hierarchy displays
- In the label dropdown, child labels appear indented under their parent.
- On work items, child labels display their full path: Platform > Frontend.
- When filtering by a parent label, you can choose to include all child labels automatically.
TIP
Use parent labels for broad categories and child labels for specific areas. This keeps the label dropdown organized even when you have 30+ labels.
Remove labels from a work item
Remove one label
- Click the label chip on the work item.
- The label dropdown opens with the label checked.
- Click the label to uncheck and remove it.
Remove all labels
- Open the work item detail view.
- In the labels section, click the x on each label chip.
Remove via bulk operations
- Select multiple work items.
- In the bulk action bar, click Labels.
- Uncheck labels you want to remove from all selected items.
Filter by label
Labels are a primary filter criterion across all layouts.
Single label filter
- Click Filter in the project header.
- Select Label from the property list.
- Choose one or more labels.
- The view shows only work items carrying at least one of the selected labels.
Exclude labels
- In the label filter, switch the operator to is not.
- Select labels to exclude.
- Work items carrying any of the excluded labels are hidden.
Combine with other filters
Labels combine freely with other properties:
- "Label is
frontendAND Priority isUrgent" -- urgent frontend work - "Label is
tech-debtAND State group isBacklog" -- tech debt not yet started - "Label is
customer-reportedAND Cycle isSprint 12" -- customer issues in this sprint
Group by label
In list and kanban views, you can group work items by label. Since a work item can have multiple labels, it may appear in multiple groups.
See Filters for the complete filter reference.
Label management in project settings
The Labels section in project settings provides a complete management interface:
| Action | How |
|---|---|
| Add label | Click Add Label, fill in name, color, optional parent |
| Edit label | Click the pencil icon next to the label |
| Delete label | Click the trash icon; the label is removed from all work items |
| Reorder labels | Drag and drop to change the display order |
| Reparent label | Drag a label under a parent, or edit and change the parent field |
WARNING
Deleting a label removes it from all work items that carry it. This action cannot be undone. The work items themselves are not affected -- only the label association is removed.
Best practices
- Establish a labeling convention early -- Agree on label names and purposes before the project accumulates hundreds of items. Changing conventions later requires bulk re-labeling.
- Use consistent naming -- Pick a case style (lowercase, Title Case) and stick with it. "Frontend" and "frontend" look like duplicates.
- Limit the total count -- Aim for 15-25 labels per project. If you need more, use parent-child hierarchy to organize them.
- Prefer specific over vague -- "auth-service" is more useful than "backend" when filtering.
- Use colors intentionally -- Assign similar colors to related labels (all platform labels in blue shades, all priority context labels in red shades) for quick visual grouping.
- Review and prune regularly -- Archive labels that are no longer used. Stale labels clutter the dropdown and reduce adoption.
- Combine labels with types -- Types classify what the work IS (bug, task, story). Labels classify what it RELATES TO (area, team, context). Use both dimensions.
- Do not duplicate states or priorities as labels -- Avoid labels like "in-progress" or "high-priority" since dedicated properties already handle those.
Related pages
- Work Item Properties -- Complete property reference
- Project Labels -- Project-level label configuration
- Filters -- Filter by label and other properties
- Views -- Save label-based filter views
- Bulk Operations -- Apply or remove labels in bulk
- Work Item Types -- Classify work by type