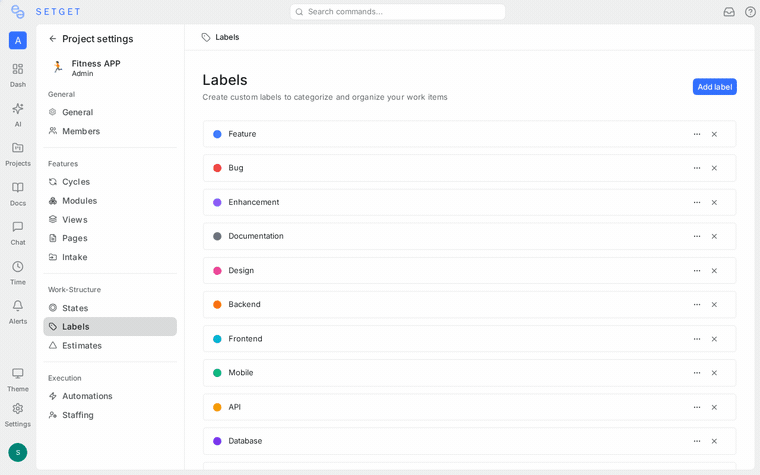
Project Labels
Labels are lightweight, color-coded tags you attach to work items to add a second dimension of categorization beyond states and priorities. While states track where an item is in your workflow and priorities track urgency, labels describe what kind of work it is. Typical labels include "Bug", "Feature", "Documentation", "Performance", "UX", and "Tech Debt". Each project manages its own set of labels independently.
Create a label
- Go to the project Settings > Labels.
- Click Create Label.
- Enter the label name (e.g., "Bug", "Feature Request", "Infrastructure").
- Choose a color from the palette or enter a custom hex code.
- Optionally select a parent label to create a hierarchical relationship.
- Click Create.
The label is immediately available for use on any work item in the project.
TIP
Keep label names short and consistent. Agree on a naming convention with your team — for example, always use singular nouns ("Bug" not "Bugs") or always use a specific prefix pattern ("area/frontend", "area/backend").
Label colors
Every label has a color that appears as a small badge on work items. Colors help with quick visual scanning in list and board views. SetGet provides a preset palette, but you can also enter any hex color code.
| Color category | Suggested usage |
|---|---|
| Red / Orange | Bugs, incidents, blockers |
| Blue / Purple | Features, enhancements, stories |
| Green | Tests, documentation, quality |
| Yellow / Amber | Warnings, needs attention, under discussion |
| Gray | Chores, maintenance, low-visibility items |
| Teal / Cyan | Infrastructure, platform, DevOps |
To change a label's color after creation:
- Go to Settings > Labels.
- Click the color swatch next to the label.
- Pick a new color.
- The change is saved automatically and reflected everywhere the label appears.
Edit a label
- Go to Settings > Labels.
- Click the label name to edit it inline, or click the ... menu and select Edit.
- Update the name, color, or parent label.
- Save your changes.
Renaming a label updates it on all work items that currently have it applied. There is no need to reapply the label after renaming.
Delete a label
- Go to Settings > Labels.
- Click the ... menu next to the label.
- Select Delete.
- Confirm the deletion.
When you delete a label:
- It is removed from all work items that had it applied.
- If the label had child labels, the children become top-level labels (they are not deleted).
- The deletion cannot be undone.
WARNING
Deleting a label is permanent and affects all work items that use it. If you are unsure, consider renaming the label instead of deleting it.
Parent-child label hierarchy
Labels in SetGet support a single level of parent-child nesting. This lets you group related labels under a common parent for better organization.
How hierarchy works
- A parent label is a top-level grouping label (e.g., "Area", "Component", "Priority Area").
- A child label belongs to a parent (e.g., "Area/Frontend", "Area/Backend", "Area/API").
- Child labels appear indented under their parent in the label settings and in filter dropdowns.
- Filtering by a parent label includes all its children.
Create a child label
- Go to Settings > Labels.
- Click Create Label.
- Enter the child label name (e.g., "Frontend").
- In the Parent dropdown, select the parent label (e.g., "Area").
- Choose a color and click Create.
Change a label's parent
- Go to Settings > Labels.
- Click the ... menu on the label and select Edit.
- Change the Parent dropdown to a different parent or select "None" to make it top-level.
- Save.
Example hierarchy
| Parent label | Child labels |
|---|---|
| Area | Frontend, Backend, Mobile, Infrastructure |
| Type | Bug, Feature, Improvement, Chore |
| Effort | Small, Medium, Large |
TIP
Hierarchy is most useful when you have many labels. If your project uses fewer than 10 labels, a flat list is usually simpler to manage.
Apply labels to work items
You can apply one or more labels to any work item:
From the work item detail
- Open the work item.
- Click the Labels field in the side panel.
- Search for and select one or more labels.
- Labels are applied immediately.
From list or board view
- Right-click a work item (or click the ... menu).
- Select Labels.
- Choose the labels to apply or remove.
Using bulk edit
- In the work items list, select multiple items using checkboxes.
- Click Bulk Edit in the toolbar.
- Under Labels, choose labels to add to all selected items.
- Click Apply.
Filter by label
Labels are a first-class filter throughout SetGet:
In work items views
- Open the Filters panel at the top of any work items view.
- Click Add Filter and select Label.
- Choose one or more labels to filter by.
- The view updates to show only items with the selected labels.
Filter operators
| Operator | Behavior |
|---|---|
| is | Show items that have any of the selected labels |
| is not | Show items that do not have any of the selected labels |
In saved views
You can save a label-based filter as a named view for quick access:
- Apply your label filters.
- Click Save View and give it a name (e.g., "All Bugs", "Frontend Work").
- Access the saved view from the sidebar under Views.
In cycles and modules
Label filters work within cycles and modules as well. Use them to see only specific categories of work within a given cycle.
Workspace labels vs. project labels
SetGet supports labels at the project level. Each project has its own independent label set. If you need the same labels across multiple projects, you can:
- Manually create matching labels in each project.
- Use project templates to include your standard labels when creating new projects.
Best practices
- Keep the list manageable — aim for 10-20 labels per project. Too many labels leads to inconsistent tagging.
- Use hierarchy for large label sets — group related labels under parents to keep the settings page and filter dropdowns navigable.
- Establish conventions early — agree on label names, colors, and when to use each label before the team starts working.
- Combine labels with filters — labels are most powerful when used in saved views to create focused work queues (e.g., "My Bugs", "Unresolved UX Issues").
- Review labels periodically — remove labels that nobody uses and consolidate labels that overlap.
Related pages
- Manage Projects — Create and configure projects
- Project Settings — Full settings reference
- Project States — Configure workflow stages
- Views Overview — Create and save filtered views
- Work Items Overview — Apply labels to work items