Work Item Priorities
Priority is a built-in property on every work item that communicates urgency and importance. SetGet provides five fixed priority levels, from Urgent (drop everything) to None (not yet assessed). Priority helps teams decide what to work on next, surface critical issues quickly, and keep lower-impact work from blocking high-impact items.
The five priority levels
Priority levels are fixed across all projects in a workspace. You cannot add, remove, or rename them.
| Level | Icon color | Numeric value | Description |
|---|---|---|---|
| Urgent | Red | 1 | Critical. Requires immediate attention. Production down, security vulnerability, or blocking the entire team. |
| High | Orange | 2 | Important. Should be addressed in the current cycle or as soon as possible. Significant user impact or business risk. |
| Medium | Yellow | 3 | Normal. Part of regular planned work. Important but not time-sensitive. |
| Low | Blue | 4 | Minor. Can wait until higher priorities are handled. Nice-to-have improvements or minor polish. |
| None | Gray | 5 | Not assessed. Priority has not been determined yet, or the item does not need a priority classification. |
The numeric value is used for sorting. When sorted by priority, Urgent items appear first and None items appear last.
Priority icons
Each priority level has a distinct icon to make it recognizable at a glance:
| Level | Icon |
|---|---|
| Urgent | Three filled bars with an alert indicator |
| High | Three bars, two filled |
| Medium | Three bars, one filled |
| Low | Three bars, none filled |
| None | Dashed circle |
The icon and color combination makes priority scannable without reading the text label, which is important in dense list and kanban views.
Set priority on creation
- Open the creation modal (click Create Work Item or press
C). - Click the priority selector. The default is None.
- Select the appropriate level.
- Complete the remaining fields and save.
When using quick-add, the work item is created with None priority. Update it afterward if needed.
Change priority on an existing work item
From any layout
- Click the priority icon on the work item row (list, spreadsheet) or card (kanban).
- A dropdown shows all five levels with their icons and colors.
- Click the desired level.
- The change is saved immediately and appears in the activity feed.
From the detail view
- Open the work item in detail view or peek panel.
- In the properties panel, click the Priority field.
- Select the new level.
Via bulk operations
- Select multiple work items using checkboxes or
Shift+Click. - In the bulk action bar, click Priority.
- Select the level to apply to all selected items.
Via keyboard shortcut
When a work item is selected in the list:
| Shortcut | Action |
|---|---|
1 | Set to Urgent |
2 | Set to High |
3 | Set to Medium |
4 | Set to Low |
0 | Set to None |
How priority affects ordering
Priority influences the default sort order in several places:
List view
When sorting by priority (ascending), items are ordered:
- Urgent
- High
- Medium
- Low
- None
Within the same priority level, items are sorted by their creation date (newest first) unless a secondary sort is configured.
Spreadsheet view
Click the Priority column header to sort the entire sheet by priority. Click again to reverse the order.
Kanban view
When kanban is grouped by state, priority affects the order of cards within each column. Urgent items float to the top, None items sink to the bottom.
Priority in kanban grouping
You can group kanban columns by priority instead of state:
- Open the display settings for the kanban view.
- Change Group by to Priority.
- Five columns appear: Urgent, High, Medium, Low, None.
Each column shows all work items at that priority level, regardless of their state. Drag cards between columns to change priority.
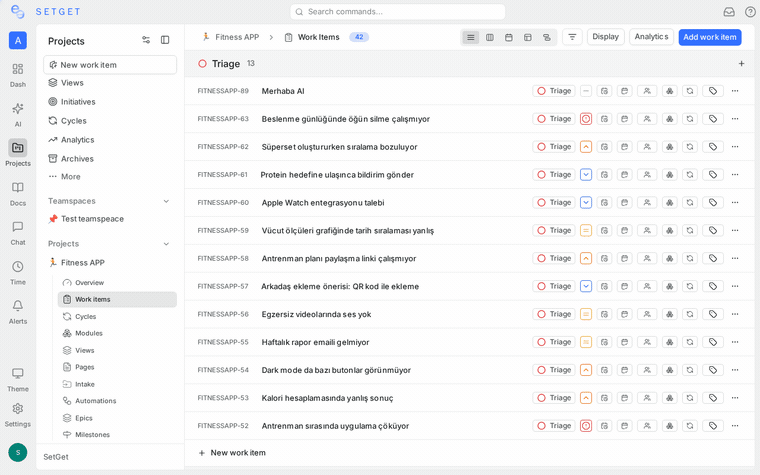
This view is useful during triage sessions when the goal is to sort incoming work by urgency rather than track workflow progress.
Filter by priority
Priority is one of the most common filter criteria.
Include specific priorities
- Click Filter in the project header.
- Select Priority from the property list.
- Check one or more levels (e.g., Urgent and High).
- The view shows only matching items.
Exclude priorities
- In the priority filter, switch the operator to is not.
- Select levels to exclude (e.g., exclude None to hide un-triaged items).
Common filter combinations
| Filter | Purpose |
|---|---|
| Priority is Urgent or High | Focus on critical work |
| Priority is not None | Hide un-triaged items |
| Priority is Urgent AND State group is Started | Urgent work currently in progress |
| Priority is Low AND State group is Backlog | Low-priority backlog candidates for deprioritization |
| Priority is Urgent AND Assignee is empty | Urgent items with no owner (needs attention) |
Save as a view
Save priority-based filters as named views for quick access. For example:
- Critical Items -- Urgent and High priority, not in Completed/Cancelled
- Needs Triage -- Priority is None, State is Backlog
See Views for details.
Priority in analytics
Priority data appears in several analytics contexts:
- Cycle summary -- Breakdown of items by priority within the cycle.
- Project analytics -- Distribution chart showing how many items are at each priority level.
- Workspace analytics -- Cross-project priority distribution to spot teams overloaded with urgent work.
Priority change activity
Every priority change is recorded in the work item's activity feed:
- Who changed the priority
- What it was changed from and to
- When the change occurred
This creates an audit trail that helps teams understand how work was triaged and re-prioritized over time.
Priority notifications
When a work item's priority changes to Urgent, SetGet sends a notification to all subscribers of that work item. This ensures urgent issues get immediate attention even if the assignee is not actively looking at the board.
Notification preferences can be configured per user. See Notification Preferences for details.
Best practices
- Triage regularly -- Schedule a weekly or bi-weekly triage session to review items with None priority and assign appropriate levels.
- Reserve Urgent for true emergencies -- If everything is Urgent, nothing is. Limit Urgent to production incidents, security issues, and items blocking multiple people.
- Use High for current-cycle priorities -- Items that should be completed this sprint but are not emergencies.
- Default to Medium for planned work -- Most items in a healthy backlog should be Medium.
- Use Low for nice-to-haves -- Polish, minor improvements, and non-critical tech debt.
- Never leave items at None permanently -- None means "not yet triaged", not "low priority". Every item should eventually get a real priority level.
- Re-evaluate priorities when scope changes -- A Medium item might become Urgent if a deadline moves up or a customer escalates.
- Combine priority with estimates -- A High-priority item estimated at XL might need to be broken down before it can be started. A Low-priority item estimated at XS might be worth doing immediately as a quick win.
- Track priority inflation -- If the percentage of Urgent and High items keeps growing, the team may be under-resourced or over-committing.
Related pages
- Work Item Properties -- Complete property reference
- Filters -- Filter by priority and other properties
- Kanban Layout -- Group kanban by priority
- Views -- Save priority-based views
- Bulk Operations -- Change priority on multiple items
- Notification Preferences -- Control priority change alerts
- Analytics -- Priority distribution reports