User Management
The User Management page in the Admin Panel gives instance administrators full control over every user account on the SetGet instance. You can list, search, create, inspect, deactivate, reactivate, and delete users, as well as terminate active sessions and perform bulk operations.
Navigate to Admin Panel > Users or go directly to /backoffice/users.
User list
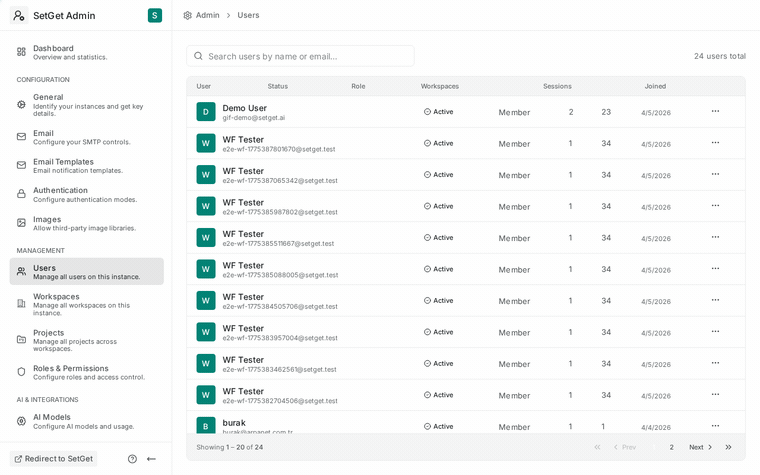
The user list displays all accounts on the instance in a searchable, sortable table.
| Column | Description | Sortable |
|---|---|---|
| Display Name | User's display name | Yes |
| Login email address | Yes | |
| Status | Active, Deactivated, or Pending | Yes |
| Role | Instance Admin or User | Yes |
| Workspaces | Number of workspace memberships | Yes |
| Created | Account creation date | Yes |
| Last Login | Most recent login timestamp | Yes |
Searching users
Use the search bar at the top of the user list to find users by:
- Display name (partial match)
- Email address (partial match)
Filtering users
Apply filters to narrow the user list:
| Filter | Options |
|---|---|
| Status | All, Active, Deactivated, Pending |
| Role | All, Instance Admin, User |
| Workspace | Filter by membership in a specific workspace |
| Created date | Date range picker |
| Last login | Date range picker, or "Never logged in" |
Pagination
The user list displays 25 users per page by default. Use the pagination controls at the bottom to navigate between pages or change the page size (25, 50, 100).
View user details
Click on any user in the list to open their detail page. The user detail page shows:
Profile information
| Field | Description |
|---|---|
| Display Name | User's name |
| Login email | |
| Avatar | Profile image |
| Timezone | User's configured timezone |
| Status | Active, Deactivated, or Pending |
| Role | Instance Admin or User |
| Created | Account creation date |
| Last Login | Most recent authentication |
| Authentication Method | Email, Google, GitHub, GitLab, Gitea, SAML, LDAP |
Workspace memberships
A table showing every workspace the user belongs to:
| Column | Description |
|---|---|
| Workspace | Workspace name (link to workspace details) |
| Role | Owner, Admin, Member, or Guest |
| Joined | Date the user joined the workspace |
| Projects | Number of projects the user is a member of |
Activity summary
| Metric | Description |
|---|---|
| Work items created | Total issues created by the user |
| Work items assigned | Total issues currently assigned |
| Comments | Total comments authored |
| Pages | Total pages created or edited |
| Last active | Most recent API activity |
Active sessions
A list of the user's currently active sessions:
| Column | Description |
|---|---|
| Device | Browser and OS information |
| IP Address | Source IP |
| Created | When the session was created |
| Last Activity | Most recent request using this session |
Create user
Instance administrators can create user accounts directly without requiring the user to self-register.
- Click Create User at the top of the user list.
- Fill in the required fields:
| Field | Required | Description |
|---|---|---|
| Display Name | Yes | User's display name |
| Yes | Must be unique across the instance | |
| Password | Yes | Must meet configured password complexity requirements |
| Role | Yes | User or Instance Admin |
| Send welcome email | No | Send a welcome email with login instructions |
- Click Create.
TIP
When creating accounts for team members, check Send welcome email so they receive login instructions automatically. This requires a working SMTP configuration.
Deactivate user
Deactivating a user prevents them from logging in while preserving all their data and workspace memberships.
- Open the user's detail page.
- Click Deactivate User.
- Confirm the action.
Effects of deactivation:
| Aspect | Behavior |
|---|---|
| Login | Blocked — all authentication methods rejected |
| Active sessions | Immediately terminated |
| Workspace memberships | Preserved but user is marked as inactive |
| Assigned work items | Remain assigned (not automatically reassigned) |
| Authored content | Remains visible and attributed to the user |
| Notifications | Stopped — no email or in-app notifications |
| API access | All API tokens invalidated |
TIP
Deactivation is the recommended approach when an employee leaves the organization. It preserves project history while preventing access. Use deletion only when data removal is required.
Reactivate user
To restore access for a deactivated user:
- Open the user's detail page.
- Click Reactivate User.
- Confirm the action.
The user can log in again immediately. All workspace memberships and data are restored to their pre-deactivation state.
Delete user
Deleting a user permanently removes their account and personal data. This action is irreversible.
- Open the user's detail page.
- Click Delete User.
- Review the data that will be affected.
- Type the user's email to confirm.
- Click Permanently Delete.
Effects of deletion:
| Aspect | Behavior |
|---|---|
| Account | Permanently removed |
| Profile data | Deleted (name, email, avatar) |
| Workspace memberships | Removed from all workspaces |
| Authored work items | Attributed to "Deleted User" |
| Comments | Attributed to "Deleted User" |
| Pages | Attributed to "Deleted User" |
| Chat messages | Deleted |
| File uploads | Deleted from storage |
| Sessions | Terminated and purged |
| Login history | Purged |
| Notifications | Purged |
WARNING
User deletion is irreversible and may affect data integrity in workspaces where the user was active. Consider deactivation first unless data removal is legally required (e.g., GDPR right to be forgotten).
Terminate user sessions
To force-logout a user from all devices:
- Open the user's detail page.
- Scroll to the Active Sessions section.
- Click Terminate All Sessions to end all active sessions, or click the terminate button next to a specific session to end only that one.
This is useful when:
- A user reports a compromised account.
- You need to enforce a credential change.
- A device has been lost or stolen.
Bulk user actions
Select multiple users from the user list to perform bulk operations.
Available bulk actions
| Action | Description |
|---|---|
| Deactivate selected | Deactivate all selected users |
| Reactivate selected | Reactivate all selected deactivated users |
| Delete selected | Permanently delete all selected users |
| Terminate sessions | End all active sessions for selected users |
| Change role | Set selected users to User or Instance Admin |
| Export selected | Export user data for selected users as CSV |
Using bulk actions
- Check the checkbox next to each user you want to include, or use the "Select All" checkbox.
- The bulk actions toolbar appears at the top of the list.
- Select the desired action.
- Confirm the operation.
WARNING
Bulk delete is an extremely destructive operation. A confirmation dialog requires you to type "DELETE" and confirm the number of affected users before proceeding.
Export user list
Export the complete user list as a CSV file for reporting or auditing:
- Click Export at the top of the user list.
- Choose the columns to include.
- Choose whether to export all users or only the current filtered view.
- Click Download CSV.
The export includes all user fields except passwords and session tokens.
User count and license
The bottom of the user list shows:
| Metric | Description |
|---|---|
| Total users | All accounts on the instance |
| Active users | Accounts with Active status |
| Deactivated users | Accounts with Deactivated status |
| Admins | Accounts with Instance Admin role |
Related pages
- Admin Panel Overview — Navigate the Admin Panel
- Workspace Management — Manage workspaces and memberships
- Authentication Settings — How users sign in
- Security Settings — Session policies and account lockout
- GDPR / KVKK — Data export and deletion for compliance
- Login Logs — User authentication activity
- Audit Logs — Track user management actions